

My NAS is an ASUSTOR Lockerstor2 Gen 2 (AS6702T). This features a pair of 3.5/2.5″ drive bays and 4-off M2 slots. This was my second attempt at buying a NAS having returned a QNAP TS-264-8G in disgust a few days after purchase because it crashed randomly. The memory on the ASUSTOR can be upgraded to 16GB.
You can buy the Lockerstore2 Gen 2 (AS6702T) from Amazon here.
There are other variants eg 4-drive available on the same page. You may also like to look at the new Lockerstor2 Gen 3 range. Sadly this does not include a 2-drive option, which makes the starting cost rather steep!
Why PortainerBE
By default, your ASUSTOR NAS ships with PortainerCE (Community addition), while this is fine for managing containers on your NAS, it lacks some of the features offered by the Business Edition (PortainerBE). For most hobbyist users, the main missing feature is likely the notification dots that you get from the BE version when containers are out of date: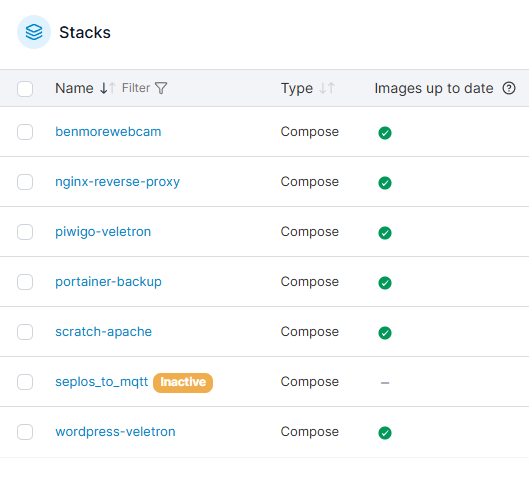
Note: PortainerBE and PortainerEE are the same beast, EE was renamed to BE
You could of course install Watchtower to add ‘new version’ notifications and update features, but for me, that’s just yet another container and I am not interested in the auto-update functionality in Watchtower. To my mind, auto-update is just asking for trouble when something randomly stops working, and it becomes a guessing game re ‘who dun it’. I prefer to update containers manually and then test the result while its fresh in my mind. I can then easily roll back if necessary.
PortainerBE can also be updated from within its own GUI while PortainerCE can only be updated from within ADM or at the command line.
The full list of differences between CE and BE is here: https://www.portainer.io/features
PortainerBE is available for free for the 1st three nodes (Docker hosts). It requires a license key that will last for a year, after which it must be renewed. You may get this by filling in this form. You may renew an existing PortainerBE license via this form.
How Not To Upgrade To PortainerBE
PortainerCE has a link top left that allows you to upgrade to PortainerBE. This does in fact work on the ASUSTOR NAS, however it will appear to have died, or will produce an error during upgrade despite having done this successfully. Re-visit the portainer web page afresh and all should be well.
I don’t however recommend this as the best route to PortainerBE.
Why not? I hear you ask! Well the issue arises with ADM updates. ADM still thinks PortainerCE is in use, indeed, the upgrade to BE uses the same Bind Mount Point. ADM upgrades will oft break your Portainer install by re-installing PortainerCE. This would not be a problem but for the fact that PortainerCE CANNOT talk to the database used by PortainerBE (eg during the upgrade to PortainerBE, your database was made incompatible with PortainerCE).
You can also break your PortainerBE by accidentally upgrading Portainer via ADM as doing so would reinstall PortainerCE instead.
This unfortunately means that Portainer will no longer start on your docker host. Fixing this necessitates clearing out the Bind Mount Point, restarting the container, and re-adding the configuration. I suspect that having a backup from PortainerBE (Settings–>General–>Backup Portainer) prior to upgrading would allow at least the import of the backup file into PortainerCE, but I have not tested this, you might need to re-upgrade to BE then do the import.
If you have upgraded ADM, and your Portainer is dead, this is likely the issue. You can check this by:
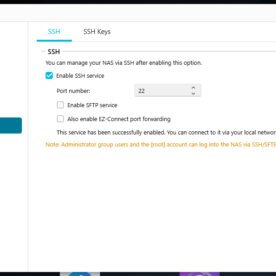
- Enabling SSH on your NAS (Services –> Terminal)
- Install Putty (or other SSH Client). https://www.chiark.greenend.org.uk/~sgtatham/putty/latest.html
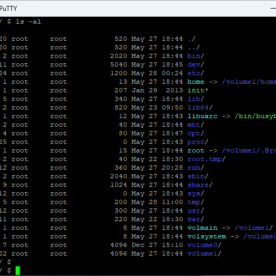
- SSH Into your NAS (same credentials you use to login to the web interface)
- In the SSH Window, type:
sudo docker ps -a
- If you see the text ‘restarting’ for the portainer container then you have your issue, as mentioned above it can be resolved by clearing out the bind mount point.

Better Way To Install PortainerBE
Personally, I think its best to leave the PortainerCE installation put in place by ADM on ASUSTOR NAS devices well alone, and to install PortainerBE alongside. The way you go about this will depend on whether you already upgraded your CE to BE or not, and whether it is already managing containers.
The mech’s below will use a docker volume rather than a bind mount to hold the Portainer data. You will need to know where the data is currently stored:
- Firstly, SSH into your NAS as per the previous section
- Visit the portainer UI: https://<NAS_IP>:19443 and login
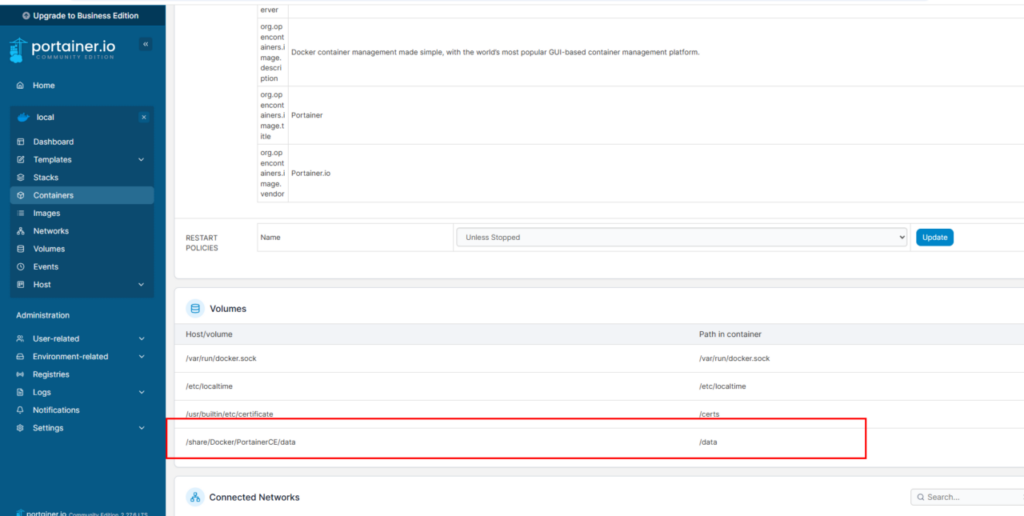
- Under containers, select the PortainerCE container and scroll down, note down the path
- In my case it is: /share/Docker/PortainerCE/data
The ASUSTOR ADM install of Portainer exposes Portainer via Port 19443 since this will remain as-is, we will need to use a different port, the examples below just use the default Port 9443
Next you will proceed depending on the current state of Portainer on your NAS:
1) I’m using the Stock PortainerCE and it has no containers in it
If you are still on PortainerCE, but its not managing any containers then the process is simple as it does not require the copying of existing configuration.
In your ssh session, enter:
sudo docker run -d -p 8000:8000 -p 9443:9443 –name PortainerBE –restart=always -v /etc/localtime:/etc/localtime:ro -v /var/run/docker.sock:/var/run/docker.sock -v /etc/localtime:/etc/localtime:ro -v /var/run/docker.sock:/var/run/docker.sock -v /usr/builtin/etc/certificate:/certs:ro -v portainer_data:/data:rw portainer/portainer-ee:latest –sslcert /certs/ssl.pem –sslkey /certs/ssl.pem
Note: you may wish to choose ‘lts’ rather than ‘latest’ – this should mean less frequent updates
The above will create a new volume ‘portainer_data’ to store your PortainerBE data.
Next visit the new PortainerBE at https://<NAS_IP>:9443
You will be asked to create a new login and to supply the license key you obtained for PortainerBE (see earlier text)
2) I Already Upgraded the Stock PortainerCE to PortainerBE
If you already upgraded the ASUSTOR Stock PortainerCE to PortainerBE and its managing containers, then you can perform install PortainerBE stand-alone by following the steps below.
If your PortainerBE is not actually managing anything then you can just follow the steps in (1) above instead.
In your ssh session, enter:
sudo docker run -d -p 8000:8000 -p 9443:9443 –name PortainerBE –restart=always -v /etc/localtime:/etc/localtime:ro -v /var/run/docker.sock:/var/run/docker.sock -v /etc/localtime:/etc/localtime:ro -v /var/run/docker.sock:/var/run/docker.sock -v /usr/builtin/etc/certificate:/certs:ro -v portainer_data:/data:rw portainer/portainer-ee:latest –sslcert /certs/ssl.pem –sslkey /certs/ssl.pem
The above will create a new volume ‘portainer_data’ to store your PortainerBE data, we will copy all the config from your old bind mount point (for ASUSTOR PortainerCE that you upgraded to PortainerBE) to the new volume for PortainerBE.
You will need to know the location of your volume for your new Portainer you can find this my entering the following command via SSH:
sudo docker volume inspect portainer_data
On my NAS, it is (note it down):
/volume1/.@plugins/AppCentral/docker-ce/docker_lib/volumes/portainer_data/_data
Back in SSH, we will now copy all your configuration from your old PortainerBE to your new PortainerBE. In SSH, enter
cd <path_to_old_bind_mount> (location of this was learnt at the start of this section)
ls (and check the data is there, eg you are in the right folder!)
cp -R -f * <path_to_new_volume>
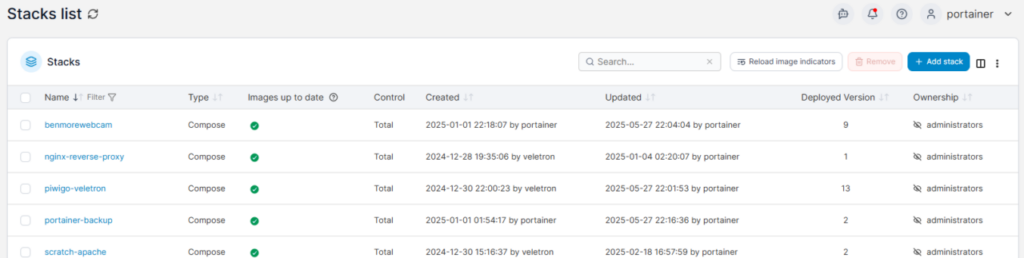
Once done, visit the new PortainerBE at https://<NAS_IP>:9443 verify that your containers are listed and that Portainer has full control. You can see the level of control in your stacks (if any) in the Control column it should say Total. Note that your login for this should be the same as that for your old PortainerBE as you copied over the data.
That’s it, but see the ‘Cleanup’ section below
3) I’m Still On PortainerCE and I already have Containers in it
If you are still on PortainerCE, and it is currently managing containers then you will install a new instance of PortainerCE, and then upgrade this to PortainerBE. We will call the new container PortainerBE in prep for the upgrade.
In your ssh session, enter:
sudo docker run -d -p 8000:8000 -p 9443:9443 –name PortainerBE –restart=always -v /etc/localtime:/etc/localtime:ro -v /var/run/docker.sock:/var/run/docker.sock -v /etc/localtime:/etc/localtime:ro -v /var/run/docker.sock:/var/run/docker.sock -v /usr/builtin/etc/certificate:/certs:ro -v portainer_data:/data:rw portainer/portainer-ce:latest –sslcert /certs/ssl.pem –sslkey /certs/ssl.pem
The above will create a new volume ‘portainer_data’ to store your PortainerBE data, we will copy all the config from your old bind mount point (for ASUSTOR PortainerCE) to the new volume (for the eventual PortainerBE)
You will need to know the location of your volume for your new Portainer you can find this my entering the following command via SSH:
sudo docker volume inspect portainer_data
On my NAS, it is (note it down):
/volume1/.@plugins/AppCentral/docker-ce/docker_lib/volumes/portainer_data/_data
Back in SSH, we will now copy all your configuration from your old PortainerCE to your new PortainerCE (that is soon to be BE). In SSH, enter
cd <path_to_old_bind_mount> (location of this was learnt at the start of this section)
ls (and check the data is there, eg you are in the right folder!)
cp -R -f * <path_to_new_volume>
Once done, visit the new PortainerCE at https://<NAS_IP>:9443 verify that your containers are listed and that Portainer has full control. You can see the level of control in your stacks (if any) in the Control column it should say Total. Note that your login for this should be the same as that for your old PortainerCE as you copied over the data.
While you are in the web interface for your new PortainerCE, upgrade it to PortainerBE, you will be asked for the license key you generated at the start:

Once the upgrade completes, revisit the URL to ensure that it was successful: https://<NAS_IP>:9443
That’s it, but see the ‘Cleanup’ section below
Cleanup
One final (optional) step where you followed (2) or (3) above is to resolve the now Frankenstein situation where both the ASUSTOR PortainerCE/BE and the self-installed PortainerBE both think they have ‘full control’ over your Stacks and Containers. To do this, you can delete the data from the bind mount for your OLD PortainerCE, and then re-visit https://<NAS_IP>:19443 and set it up from scratch. You could also simply remove it via ADM.
Backups
Having a recent backup of your PortainerBE data is important, it will allow an easy restore in the event of dataloss. The same obviously also goes for all your Bind Mount’s and Volumes!
Some folks reading this might be used to using Bind Mounts rather than Volumes and wonder how they might easily backup a volume that’s seemingly hidden away in the depths of the NAS filesystem eg:
/volume1/.@plugins/AppCentral/docker-ce/docker_lib/volumes/portainer_data/_data
The solution is simple, and involves the use of a container designed to perform backups. I recommend you apply the same principal to all your containers by simply including the backup container within each stack.
For PortainerBE backup, create a new Stack ‘Portainer-Backup’, and paste in the following.
services:
  backup:
    container_name: portainer-backup
    image: offen/docker-volume-backup:v2
    restart: always
  environment:
    BACKUP_FILENAME: portainer-backup-%Y-%m-%dT%H-%M.tar.gz
    BACKUP_PRUNING_PREFIX: portainer-backup-
    BACKUP_RETENTION_DAYS: '30'
    BACKUP_CRON_EXPRESSION: "10 0 * * *"
    BACKUP_COMPRESSION: "gz"
    BACKUP_STOP_DURING_BACKUP_LABEL: portainer
  volumes:
    - portainer_data:/backup/:ro
    - /var/run/docker.sock:/var/run/docker.sock:ro
    - /share/<path_to_shared_backups_folder>/portainer-backup:/archive

volumes:
  portainer_data:
    external: true
The above will backup your PortainerBE configuration as a zipped tarball, storing it in: /share/<path_to_shared_backups_folder>/portainer-backup. Backups are daily at 00:10:00, and 30 backups will be retained. If you want to check your cron expression you may do so here.
Deploy the stack and check that it works on the next schedule, or mess with the time temporarily to make the job run every 5 mins eg: */5* * * *
Note that we cannot stop the PortainerBE container prior to backup (as one usually would), but Portainer is a simple soul, so its unlikely that backing it up live will cause issues.
See the help for the ‘docker-volume-backup’ container for more info: https://github.com/offen/docker-volume-backup
Note that we are hooking into the pre-existing portainer_data volume (mounting it read only), this is why the external: true is needed. If this was omitted then an empty volume for the backup container would get created and backed up instead which would be a bit useless!
Conclusion
As a result of these changes, you now have a PortainerBE that runs completely separate from the ASUSTOR ADM-Installed PortainerCE. This means that you can update ADM, or PortainerCE within ADM and it wont break your PortainerBE. If you wished, you could simply uninstall PortainerCE via ADM, but its maybe best to keep it hanging around?
Leave a Reply